Your first campaign
Follow these steps in order. Each one matches a section of the campaign form.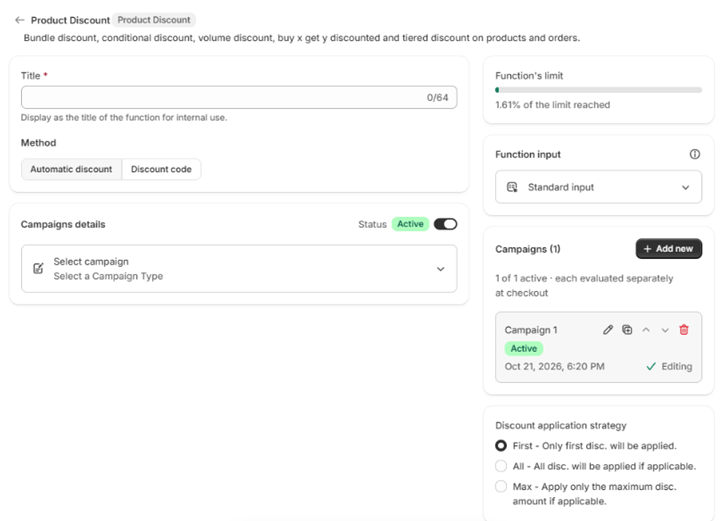
1
Choose where the discount applies
On the Home page, click Create on the Discounts Functions card. Pick Product Discounts, Order Discounts, Shipping Discounts or Unified Discount. This choice is fixed once the campaign exists. See Discount classes.
2
Pick a campaign type
Choose Conditional Discount, Buy X Get Y, Buy One Get One, Bundle or Volume. The campaign name is optional and never shown to customers. See Campaign types.
3
Set your qualifiers
Restrict who gets the discount with customer and cart qualifiers, and choose whether all conditions (And) or any condition (Or) must pass. See Qualifiers.
4
Define the discount
Pick which products are eligible and the value to apply: a percentage, a fixed amount or a fixed price. See Discount value and eligibility.
5
Schedule and save
Choose Automatic discount or Discount code, set the start and end dates, and save. See Schedule and save.
6
Show it on your storefront
Open Storefront in the app navigation and add the theme blocks, so shoppers see the offer before they add to cart. See Theme blocks.
7
Check it at checkout
Add a qualifying product to your cart and go to checkout. See Seeing your discount at checkout.
Step 6 is optional: the discount works at checkout without it. The theme blocks are what make shoppers notice the offer.